• Skip to main content
  • Skip to header right navigation
  • Skip to site footer
  • YouTube
  • MakerWorld
  • Instagram
  • Threads
  • Bluesky
  • Mastodon
  • Facebook
makerhacks-logo

Maker Hacks

Ideas, news & tutorials for makers and hackers – Arduino/Raspberry Pi, 3D printing, robotics, laser cutting, and more

  • Home
  • About
  • 3D Printing
  • Laser Cutting
  • YouTube
  • Free Arduino Course
  • Recommendations
  • Contact

Linux Automation Tips: Create a Boot/Start Menu with Python

You are here: Home / Software and Programming / Linux Automation Tips: Create a Boot/Start Menu with Python
FacebookPin
Author: Chris Garrett

pi entertainment centre

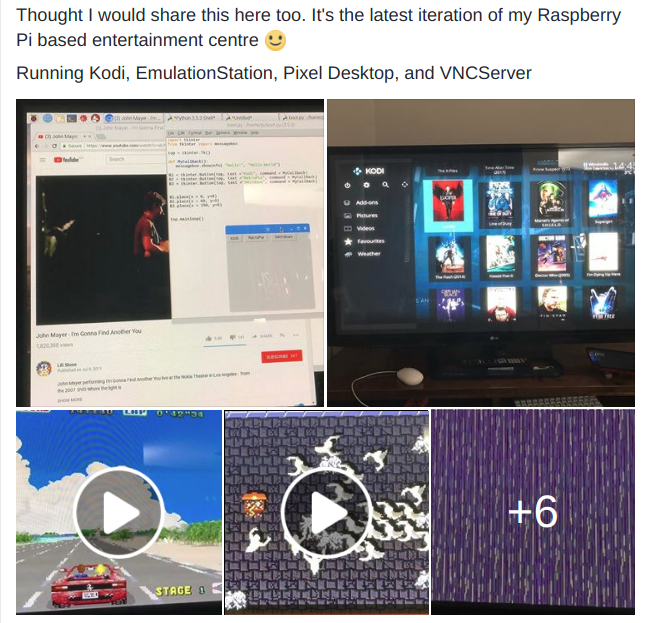
You may have seen in the Maker Hacks Facebook Group the latest iteration of my Raspberry Pi based entertainment center. It’s now got to the point where I need a boot menu, so I thought I would share the code and implementation with you!

python linux boot menu

Code

See the full code in the Gist.

First we need to add the readchar module. Use pip3 install readchar.

This module simplifies interpreting keypresses, otherwise, we would need to look up the escape codes and such ourselves. Not fun.

The other module is the os module which allows us to clear the screen (os.system('clear')) and launch programs.

Once you have done this it is a simple case to do an infinite while loop and look for the specific keys we want the user to choose from.

Remember I said the module helps us? Check out where looking for the Enter key is made much easier:

if(key == readchar.key.ENTER):

We launch the programs using os.system – you can get more clever with it but this works for our purposes.

import os
import readchar

# place in your start up file:
# sudo nano ./.bashrc


def menu():
    while True:
        os.system('clear')
        print("\t\tChoose from the following options:\n\n")
        print("\t\tk: Kodi")
        print("\t\tr: Retro Pi")
        print("\t\tx: XWindows")
        print("\n\t\tEnter to quit to terminal\n\n\n")

        # Read a key
        key = readchar.readkey()
        if(key == 'k'):
            print("Launch Kodi")
            os.system("kodi")
        elif(key == 'r'):
            print("Launch RetroPie")
            os.system("emulationstation")
        elif(key == 'x'):
            print("Launch X Windows")
            os.system("startx")
        elif(key == readchar.key.ENTER):
            print("Exit to terminal")
            break
        else:
            print("Please choose an option from above")


if __name__ == "__main__":
    menu()
Category: Software and ProgrammingTag: Hacks, linux, making, python, technology
FacebookPin

About Chris Garrett

Marketing nerd by day, maker, retro gaming, tabletop war/roleplaying nerd by night. Co-author of the Problogger Book with Darren Rowse. Husband, Dad, 🇨🇦 Canadian.

Check out Retro Game Coders for retro gaming/computing.

☕️ Support Chris on Ko-Fi to get exclusive content and rewards!

Previous Post:GrovePi Gyro, Buttons, DisplaysUsing Grove Sensors, Buttons, and Displays, with Raspberry Pi and Python
Next Post:Running Raspberry Pi AND Arduino for the Best of Both WorldsRaspberry Pi and Arduino

Sidebar

  • Facebook
  • Instagram
  • YouTube

Featured Posts

  • CyberBrick Review + Getting Started
  • xTool M2 Review
  • xTool F2 Ultra Review
  • xTool F2 Review
  • xTool S1 Review
  • Anycubic Kobra S1 Combo Review
  • Makera Z1 Pro Review
  • CNC Buyer's Guide
  • eufyMake E1 UV Printer Review
  • eufyMake Purifier P1
  • Z80 on a Breadboard
  • OpenSCAD MakerWorld Customizer

30 Days to Arduino

Arduino Tutorials
  • 3D Printing
  • CNC
  • Electronics and Hardware
  • Laser Cutting
  • News and Reviews
  • Software and Programming

arduino budget cad cnc diode laser glowforge Hacks Ideas laser cutter linux Makes making python raspberry pi resin Reviews technology tips xTool Lasers

  • YouTube
  • MakerWorld
  • Instagram
  • Threads
  • Bluesky
  • Mastodon
  • Facebook

.

Maker Hacks Blog Copyright © 2026 · All Rights Reserved · Privacy Policy